相信各位看官肯定在平时工作或多或少都有接触过SpringBoot,它在我们项目的开发过程中提供很多遍历,那为什么SpringBoot在使用的过程这么方便了,原因就在封装好的Starter,随着版本的推移,Starter成员将与日剧增。另外在传统的Maven项目中通常有分模块来管理,以便相互依赖复用。在SpringBoot中我们也可以创建自定义的Starter来达成目的。
创建项目
创建一个Maven项目并引入相关依赖,pom文件如下:
<?xml version="1.0" encoding="UTF-8"?>
<project xmlns="http://maven.apache.org/POM/4.0.0"
              xmlns:xsi="http://www.w3.org/2001/XMLSchema-instance"
              xsi:schemaLocation="http://maven.apache.org/POM/4.0.0 http://maven.apache.org/maven-v4_0_0.xsd">

      <modelVersion>4.0.0</modelVersion>
      <groupId>cn.demo.springboot</groupId>
      <artifactId>demo-spring-boot-starter</artifactId>
      <version>1.0-SNAPSHOT</version>
      <!-- 为什么要引入这个依赖,在SpringBoot的源码分析中会解释-->
      <dependencies>
        <dependency>
          <groupId>org.springframework.boot</groupId>
          <artifactId>spring-boot-autoconfigure</artifactId>
        </dependency>
      </dependencies>

      <dependencyManagement>
        <dependencies>
          <dependency>
            <groupId>org.springframework.boot</groupId>
            <artifactId>spring-boot-dependencies</artifactId>
            <version>1.5.14.RELEASE</version>
            <type>pom</type>
            <scope>import</scope>
          </dependency>
        </dependencies>
      </dependencyManagement>
</project>
这里顺便提下,非官方的starter命名规则,官方给出的建议为name-spring-boot-stater的格式
创建功能Service
我们这里定义的Service包含一个固定的字符(Hello)+ 输入的字符,如 Hello world
public class DemoService {
    private String example;
    public DemoService(String example) {
        this.example = example;
    }
   public String print(String word) {
        return example + word;
    }
}
自定义AutoConfigure类
这里必须要自定义AutoConfigure类,后面的源码会分析为什么必须要重写
自定义的AutoConfigure类 如下:
@Configuration
@ConditionalOnClass(DemoService.class)
public class DemoServiceAutoConfigure {

    private String example = "Hello";

    @Bean
    public DemoService demoService() {
        return new DemoService(example);
    }
}
创建META-INF/spring.factories文件
为什么要创建spring.factories文件,同样的源码分析也会介绍到
org.springframework.boot.autoconfigure.EnableAutoConfiguration=top.starlin.example.DemoServiceAutoConfigure
最后用maven命令打包 mvn:install,至此自定义的starter便开发完成了,下面将通过引入该starter来验证一下是否可以使用
验证
创建一个SpringBoot应用,引入依赖
<dependencies>
    <dependency>
        <groupId>org.springframework.boot</groupId>
        <artifactId>spring-boot-starter-web</artifactId>
        <version>1.5.14.RELEASE</version>
    </dependency>
    <!-- 这里引入自定义的stater-->
   <dependency>
        <groupId>top.starlin</groupId>
        <artifactId>demo-spring-boot-starter</artifactId>
        <version>1.0-SNAPSHOT</version>
    </dependency>
</dependencies>
测试代码如下:
@SpringBootApplication
@RestController
public class DemoApplication {

    public static void main(String[] args) {
        SpringApplication.run(DemoApplication.class, args);
    }

    @Resource
    private DemoService demoService;

    @RequestMapping("/example")
    public String input(String word) {
        return demoService.print(word);
    }
}
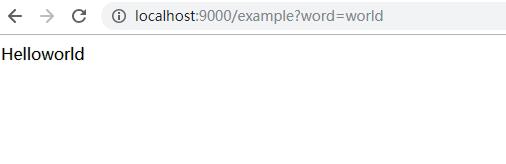
启动DemoApplication之后,输入http://localhost:9000/example?word=world,显示如下:
最后总结下自定义starter,总共需要如下几步:
- 创建自己的模块,名字安装官方的建议
- 增加需要的依赖
- 创建对应的AutoConfiguration
- 创建META-INF/spring.factories文件
以上,感谢阅读